Image manipulation is cool: you can see the result. And people generally like to somehow enhance their pictures. Instagram is now a standard, but before it people were already altering photos to create pop-art like pictures or to enhance their colors. Go check 500px and you'll see that the amount of pictures that were digitally altered is huge.
What's with HSL?
If you've been working with computer software, you must have seen colors being described in terms of RGB values because the additive primary color model is just like what the computer screen ends up using.
But what's a nice model to use for display technology purposes is hardly the
most intuitive model for playing around with pictures. Sure that if you've been
using image editing software or doing some kind of web development, you've
probably grown accustomed to the RGB model and you probably read #FF0000 as
"solid red". That's OK.
However, the HSL model is a lot nicer for some image operations. Instead of expressing the colors in 3 dimensions that are about the amount of a primary color, this model represents colors in terms of:
- Hue (what you may think of as a pure color)
- Saturation (you may think of it as the amount of color) 100% 0%
- Lightness (what makes your color closer to black or white) 5% 95%
How do these dimensions help us? Depends on what you're doing. Making a picture gray scale? Just set saturation to 0 everywhere. Want to make it feel lighter or darker? Just play with lightness and leave everything else as is. You can do all that in the RGB model, but it's usually less intuitive.
Even if you feel like you've spent too much time understanding one color model to get interested on another, note that HSL is much easier to learn because it's more related with the way that we, humans, perceive colors.
Image effects that become easy with HSL
To show these effects, let's start with Lenna, because she's a standard.
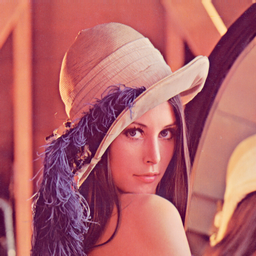
I'll describe how to use these algorithms using Python with the Python Image Library (PIL) and the colorsys package (which is part of the standard library).
We'll also need a piece of boilerplate code to help us with loading images and storing some relevant attributes (such as dimensions), some functions to help with the conversion from RGB to HSL and back to RGB (because we'll be manipulating the image in HSL but PIL only talks RGB).
from PIL import Image, ImageColor
from colorsys import rgb_to_hls, hls_to_rgb

IMAGE_SRC = 'lenna250.png'

def showme(img):
    """ use PIL standard display """
    img.show()

def h_dist(h1, h2):
    """ distance between color hues in angular space,
    where 1.0 == 0.0 (so distance must wrap around if > 1)"""
    return min(abs(h1+1-h2), abs(h1-h2), abs(h1-1-h2))

def rgb2hls(t):
    """ convert PIL-like RGB tuple (0 .. 255) to colorsys-like
    HSL tuple (0.0 .. 1.0) """
    r,g,b = t
    r /= 255.0
    g /= 255.0
    b /= 255.0
    return rgb_to_hls(r,g,b)

def hls2rgb(t):
    """ convert a colorsys-like HSL tuple (0.0 .. 1.0) to a
    PIL-like RGB tuple (0 .. 255) """
    r,g,b = hls_to_rgb(*t)
    r *= 255
    g *= 255
    b *= 255
    return (int(r),int(g),int(b))

def reload_img():
    global img, sizew, sizeh, maxsize, imgdata
    img = Image.open(IMAGE_SRC)
    sizew, sizeh = img.size
    maxsize = ((sizew/2)**2 + (sizeh/2)**2)**0.5
    imgdata = list(img.getdata())
Now it becomes trivial to do things such as...
Converting Image Color
# change image to single color (hue)
# while keeping saturation and lightness
reload_img()
for hue in range(0,4):
    for i in range(0,len(imgdata)):
        (h,l,s) = rgb2hls(imgdata[i])
        h = hue * 0.25
        imgdata[i] = hls2rgb((h,l,s))

    img.putdata(imgdata)
    showme(img)
And the output is similar to the color palette of a CGA display.

Here we kept the saturation and lightness of colors but based everything into 4 distinct hues in our [0.0 .. 1.0] scale (h = 0.00 , 0.25 , 0.50 , 0.75 ).
For extra impact, we may also increase saturation.
Same as the above (h = 0.75 ) but with s = 1.
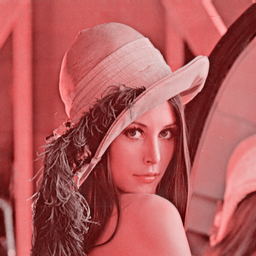
Increasing relevance of a single color
We can increase the relevant of a single color by dimming all other colors, and we can easily do that by reducing their saturation. The formula is simple: the more distant a pixel's color hue from our target color hue, the more we'll reduce the saturation.
We can use the above function hdist to get how distant the pixel hue is from
ours. Since the hue space goes from 0 to 1 and wraps around, the maximum
distance is 0.5. If we double the result from hdist we'll
have a number ranging from 0 to 1 that represents the distance to our target
color. Having a number between 0 and 1 is great because it means that we can use
this number directly as the saturation value or use it as a correction
coefficient by multiplying it with the current saturation value.
reload_img()
for i in range(0,len(imgdata)):
    (h,l,s) = rgb2hls(imgdata[i])
    ## Here we chose ONE of the following formulas:
    # dim all but blues
    s *= (1-h_dist(h, 0.75)*2)
    # dim all but blues (quadratic makes our "close to blue" mean closer)
    s *= (1-h_dist(h, 0.75)*2) ** 2
    ## don't correct, replace
    s = (1-h_dist(h, 0.75)*2)
    imgdata[i] = hls2rgb((h,l,s))
img.putdata(imgdata)
showme(img)
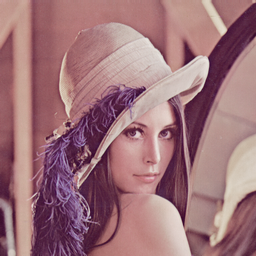
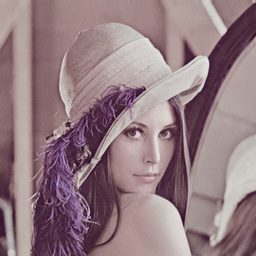
Linear correction, Quadratic correction and Linear replacement respectively. You should be able to see the original image by hovering the mouse or tapping on any of the images.
As you can see, blues are mostly kept while all other colors fade. This makes them more noticeable.
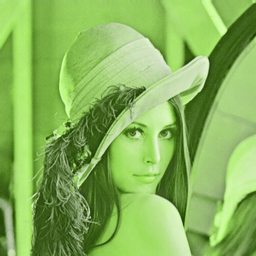
Movie like effects
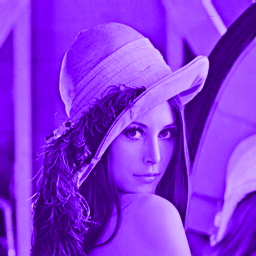
We can easily get a Predator-like vision by using lightness directly as hue, with full saturation.
# the predator vision
# full saturation, lightness-based hue, constant lightness
reload_img()
for i in range(0,len(imgdata)):
    (h,l,s) = rgb2hls(imgdata[i])

    s = 1 # one
    h = l # L (lowercase-L, probably the worst variable name)
    l = 0.5
    imgdata[i] = hls2rgb((h,l,s))

img.putdata(imgdata)
showme(img)

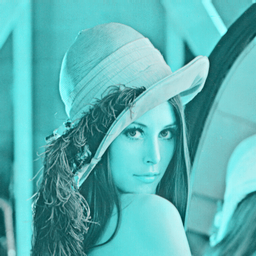
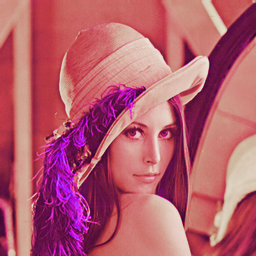
We can also simulate a Terminator-like vision by switching everything to red hue, using full saturation, and putting lightness to its extremes — making everything light lighter and everything dark darker.
The trick here is to always use smooth corrections for lightness. If we just did something like
if l < 0.5: l = l * 0.7
else: l = min(l * 1.5, 1)
the resulting image would clearly reveal the lack of smoothness of our approach in areas that should smoothly pass through the threshold

In order to overburn lightness smoothly, we can use a S-curve function such as an adaptation of the Logistic function. Our resulting code could then be something like
# the terminator vision
# red hue, full saturation, lightness based on original lightness
# but S-curved (more gravity at the extremes of the scale)
reload_img()

# we'll use Euler's constant in the Logistic function's formula
e = 2.718281828459045

for i in range(0,len(imgdata)):
    (h,l,s) = rgb2hls(imgdata[i])

    h = 0
    s = 1
    # Adaptation of the Logistic Function
    # A factor of 4+ is OK but the bigger the number, the bigger the gravity
    # towards extremes of the scale.
    s_curve_factor = 10
    l = 1/(1+e**(s_curve_factor-l*s_curve_factor*2))
    imgdata[i] = hls2rgb((h,l,s))

img.putdata(imgdata)
showme(img)
.")

Rainbows
By rotating the hue value, it's trivial to create a rainbow.
# hue according to pixel position, increasing from
# top to bottom
h = float(i)/len(imgdata)

# hue according to pixel position, in a radial progression from
# image center towards corners
h = ((x-sizew/2)**2 + (y-sizeh/2)**2)**0.5 / maxsize

# radial rainbow
h = ((x-sizew/2)**2 + (y-sizeh/2)**2)**0.5 / maxsize
# but instead of replacing original data, we average it with the original
# data with weights (3/4 original, 1/4 rainbow)
imgdata[i] = tuple((3*a+b)/4 for a,b in zip(imgdata[i],hls2rgb((h,l,s))))

By merging the radial rainbow with the original colors, in this particular case, we end up with both a subtle aura and heterochromia iridum.
In Summary
Any of the presented effects is more intuitive to create when operating in an HSL space than when operating in the RGB one. Unfortunately due to the popularity of the RGB notation, especially in web development, people seem to forget that other color systems exist, including ones that may be more appropriate to create whatever effect they need.